Howl's Moving Castle Embroidery Journal

My personal experience creating this hoop was all fun! This hoop really hit a core memory, each time I touched it something new came up to put on it. I searched for this image on Pinterest when I first started embroidering back in 2020, just a little before covid. The only thing I actually embroidered when I traced it was Howl's outline never touching it for more than a year.
My original idea was to make the outline of Howl with no color fill and just metallic thread for the ember of the shooting star. I had no confidence of even attempting to fully color it, background or thread, I got flustered at the thought of doing it and the hoop disappeared over the year.
1 year and 1/2 later...

He's in a completed 8 inch hoop, painted with a somewhat navy blue color but also mixed with some dark purple to add some slight hue to resemble the night time sky in the movie, I went filling in with DMC embroidery floss thread, using only one strand again. In this piece I also did a little needle painting to add some more colors to the spark without over powering the piece with gold metallic thread all over. instead I accentuate the needle painting to resemble a lot like fire and add the metallic thread in a subtle way to not make this hoop or the fire too busy.


When I started this piece, I had already started with the outlining of it. I think the reason I put this hoop down and never touched it, was because it wasn't a screen cap I took and I remember taking this image from Pinterest my beginners days, once I started educating myself on all the wrong of stealing someones art that was another reason I didn't touch it. I also started to get into the habit of saving my own screenshots and scenes from the movies and Manga's I adore and focused more on those.


Because I did this over a year ago, my mind had no idea about needle painting or being able to watercolor the background or fabric for that matter.
Once I saw what my mind was trying to do, I excelled and was surprised by how far I went for this hoop and began to use every multi media idea I had for this piece.
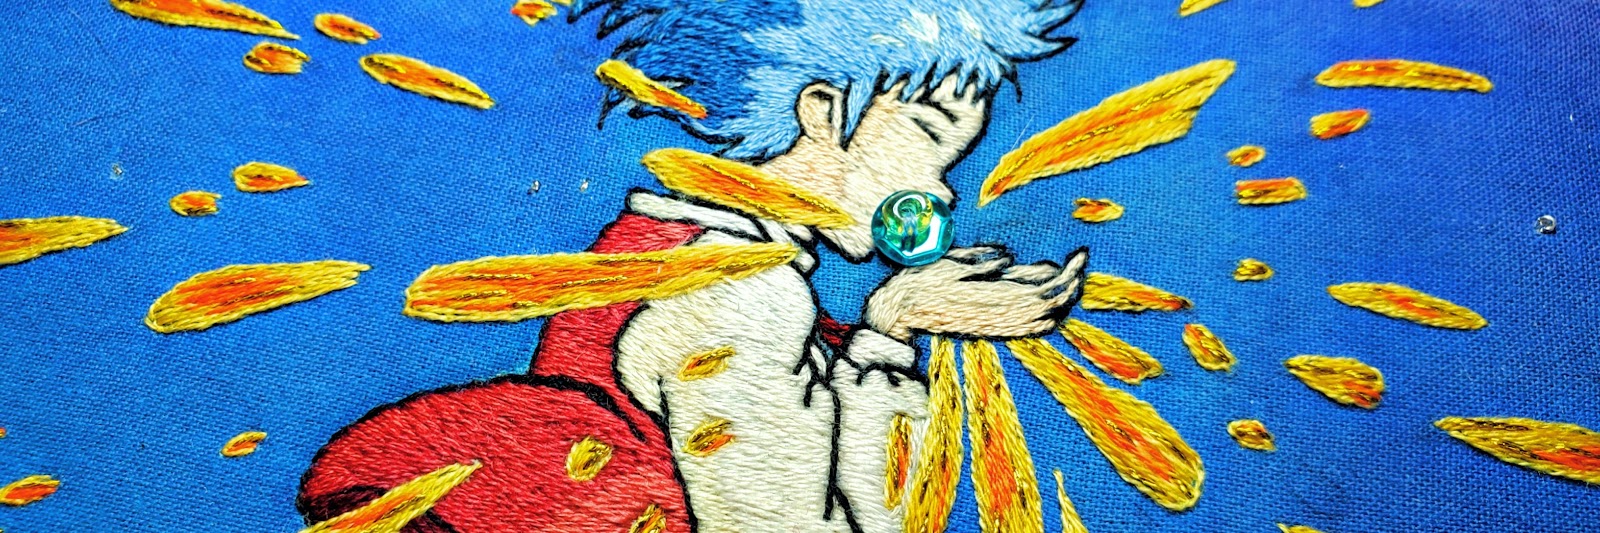
Every fiber in my body just wanted to toss it because I didn't think the ideas I had would look right with this image, but once I added the shading outlines for him and starting to take bits of ideas and creating color schemes from the original image of the movie scene when Howl swallows Calcifer.

Getting my watercolors ready and making sure Howl is tightly in his hoop to avoid water shrinking my fabric or moving the threads.
-Small tip to avoid your watercolor or iron from shrinking your fabric when embroidering, you should definitely wash your fabric before hand. I like doing this before hand embroidering because it gives the cotton a much more durable texture that keeps my threads in place. not entirely sure if this is a pro tip but this is what I do with all my new cotton fabrics.

He's ready for his watercolor!
Also if you're new to embroidering, depending on the situation it's better to do your outline before filling your work in case of watercolor seeping into your colored threads.
Water coloring and Embroidering the Background

I used quite a few colors to get the ombre effect just right, I also needed a lighter color to replicate the effect of when Howl is swallowing Calcifer it seems there is a glimmer emitting from him, so I had to take that into consideration. I know most are thinking- what's with the black color? I added a small bit of black to my darkest and LIGHTEST purple and blue, creating a shading and shadow effect around the embroidery hoop.
Of course when making your shade colors be sure to put those colors aside to not confuse yourself with your base colors and shadow colors. My original idea was to add sequins to the entire background to give it some dimension onto the fabric and hoop within itself.
When working with any type of embroideries I tend to like to use the entire fabric and hoop with any type of effect, of course depending on the design and character, be sure to visualize and use your props to help you get a better insight on things like this before jumping the gun,
I thought the sequin idea would've been a great one, but turned out when I did my placement no matter how subtle I tried, those sequins really made my hoop look really off.


My idea was to add sequins that matched the shading of the ombre effect I added with the watercolor, which was an amazing idea but not fit for this piece, since I already had a similar sequin idea when making the back of this hoop it really would've thrown the front of this piece to the curb. So instead I continued to go darker on my background for this hoop and leave the sequins for another project!

For the fire sparks on this hoop, I watched the movie to get a better imagination on the colors I need to better match the photo and art piece I'm working on, once I picked all my colors I was so ready to start filling in Howl. When I originally started this piece, I wasn't going to use colors since all I wanted to do was line art with some color, haha too me back then right, Now I can't even leave a piece without putting some color.
Again using the one strand method as usual, call me stereotype or cognitively prejudice but I very much prefer the one strand method and you'll most likely see this being used in almost all of my pieces, the only time I ever use more than one strand is to add dimension.

I didn't get the chance to take photos of me placing the bead and sequin since I needed both my hands

The photos didn't do the shine to this justice, but he's completed and I love the process to this already.


As you can see the glass bead is clear, I first put the bead but it didn't give much of a shine but then putting the sequin under made it so much better and gave much more of a blue hue!

Once I finished needle painting the fire and replicating the colors from my reference images I started with the backing process, unfortunately I didn't take step by step photos of it since the back looks self explanatory.
I also am creating an Embroidery Hoop Backing Blog so stay tuned!
Finished shots!


Comments
Post a Comment