Embroidery Tips I wish I knew | Sailor Moon Mercury Edition: Free Embroidery Pattern
Hand Embroidery Tips I wish I knew!

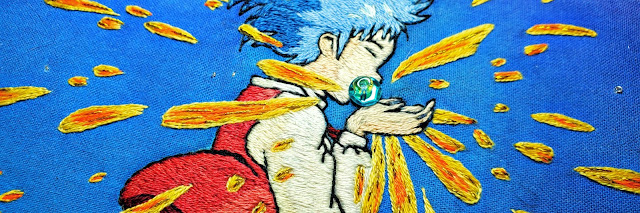
Sailor Moon Mercury Edition

 |
| "Mercury Star Power! Make Up!" |
 |
| "Together, we fight for love and justice, and together we will triumph." |
In this blog segment I will be providing a few hand embroidery tips and small step-by-step picture tutorials, when it comes to sketching your stitching guidelines. Also letting you in on small tips I wish I knew when I first started embroidering. In addition I will be sharing my DMC Color Thread Palette and the outline pattern I created myself.
☽ ♡ ☾
This embroidery hoop was created for a Sailor Moon Collaboration featuring 10 other amazing artists. Please don't forget to check my Instagram to see your favorite Sailor Scout to get a full view of the completed group, the artists' who created them did such breathtaking job, I promise you it's so worth it!
Artist Credits:
❥❥❥❥❥Sailor Chibi Moon ~ @heartfeltloves❥Sailor Uranus ~ @jredcrafts❥Sailor Neptune ~ @knotscape❥Sailor Pluto ~ @otcha.bordados❥Sailor Saturn ~ @kirameku_shop❥
🎔
Creating the Outline Pattern
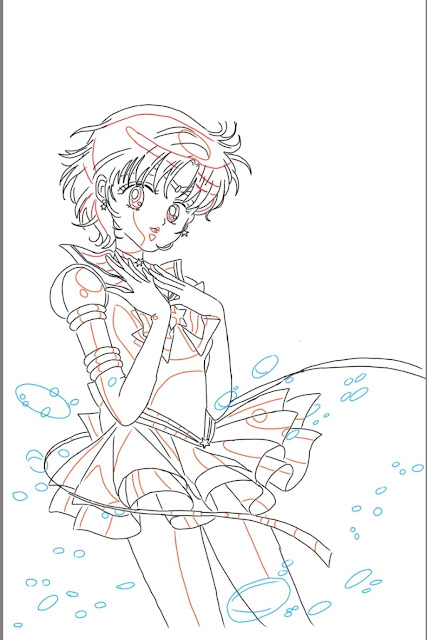
When creating the outline for my embroidery design I use an app on my tablet called “Sketchbook”, this app lets me sketch my outline of the image I’m using to later transfer the pattern to embroidery hoop.
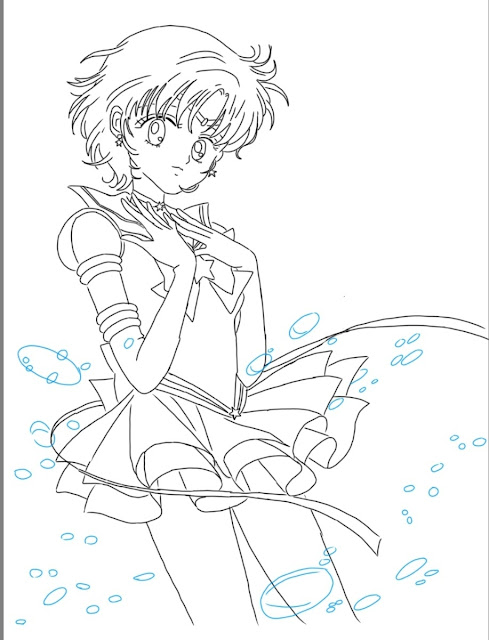
I first created the basic outline where I’ll mainly focus on the outside lines of the image, saving that and then moving onto my sketching the shading guidelines where I’ll be blending my thread colors for needle painting. As I was tracing my reference image, I began to visualize how I will be designing the entire embroidery hoop I'm creating.
🎔
Transferring the Pattern
Once you’ve printed your image, you can then begin to do the carbon paper tracing method.
Again this is my preferred process to transfer the image onto the fabric. If you’re comfortable using fabric solvy then that’s completely fine! I usually use fabric solvy to create my hoop backs!
If you need a little more help or want to see a few other ways to transfer your reference image onto your embroidery hoop, you can check out my blog on how I do it!
https://senpaistitching.blogspot.com/2022/07/3-ways-to-transfer-embroidery-pattern.html
Transfer Outline Done!
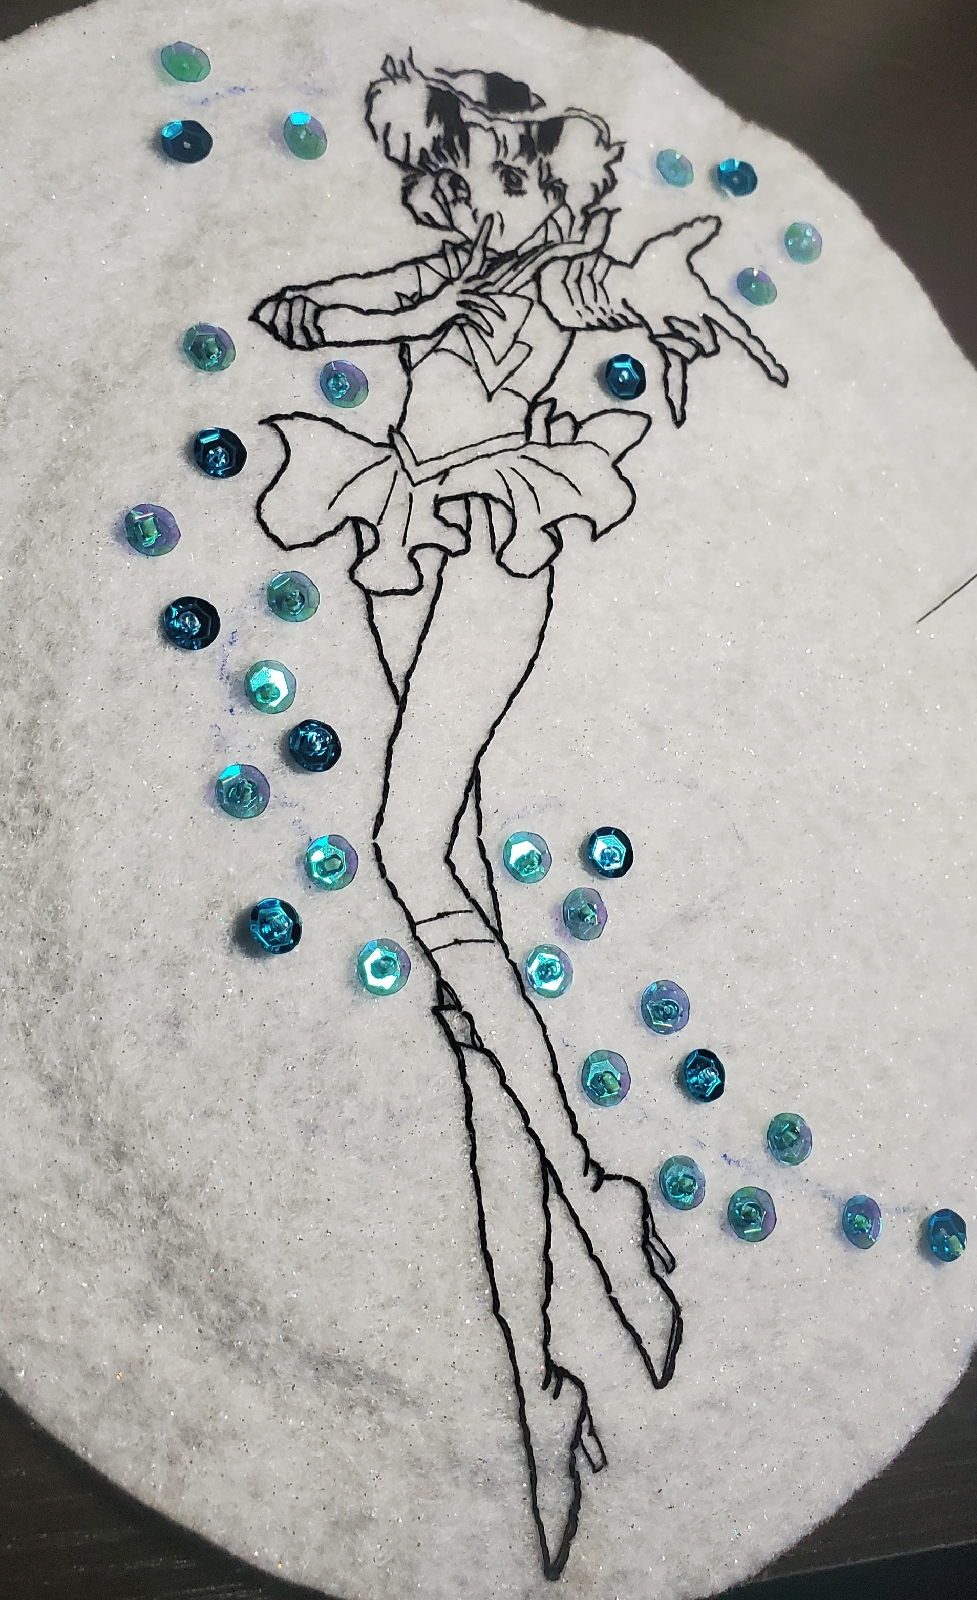
Stitching on the Felt
I don't know what it is, but something about stitching white thread on white fabric makes me cringe, so I was happy to have found the inspiration from @heartfeltloves to use felt for the uniform, this was actually my second time using felt and I was super nervous!
When printing out my images, I was sure to print out 2 of the same sized image.
One, to use when tracing it out with my carbon paper. I usually use pen to really imprint my image onto fabric, once that’s done I keep it for reference when embroidering.
Two, to create and cut out chosen pieces of the uniform to utilize them as stencils for my felt pieces. I made sure that both of these images were to be the same size so the felt pieces I cut out are a perfect fit.
I used a basic blanket stitch when attaching to the felt pieces onto the fabric, I also had some small scissors on hand to cut away the bulk of the felt that kept poking out of the outline. Always be sure you’re using the same color thread as the felt you are using.
🎔
Thread Direction | Including DMC Color Codes
- Color Palette
DMC THREAD COLORS
799 Medium Delft Blue
3839 Medium Lavender Blue
BLANC
3842 Deep Wedge-wood Blue
796 Dark Royal Blue
*Sewing Thread: Navy Blue
Outline for Eyes:
930 Very Light Antique Blue
Hair:
820 Very Dark Royal Blue
518 Light Wedge-wood Blue
B5200
3843 Electric Blue
762 Pearl Grey
Skin:
3770 Very Light Tawny
ECRU
Skirt Ruffle and Bow:
334 Medium Baby Blue
519 Sky Blue
826 Medium Blue
799 Horizon Blue
747 Sea Mist Blue
3843 Electric Blue
3845 Turquoise
762 Pearl Grey
3753 Light Antique Blue
Lips:
Sewing thread: Blue
3354 Hydrangea Pink
Felt Skirt Shading:
820 Very Royal Dark Blue
791 Very Dark Cornflower Blue
Outline:
3807 Cornflower Blue
 |
| Rough Draft of my color palette |
I think my biggest goal going into this project piece was to stay diligent in my needle direction. In this part I’ll be sure to go into detail how I stitched and what colors I used. When I started filling in my embroidery piece, I began from bottom to the top. I usually do the facial details last hence why I start from the bottom just to get it over with.
Note: I only drew one (1) vertical guideline up and down, that one line is also my shading guide. One side (left side) will be my highlight thread color and the side (right side) will be my shade color.
Also drawing in the tiny boxes after I created my horizontal lines, it became much easier and neater, in my opinion, having a guide of how much thread to use, the direction I’ll be stitching and the area I am working in.
Moving onto thread filling the skirt ruffle.
Creating many guidelines on the skirt to ensure I create a shiny, satin effect. Repeating my small boxes step from the beginning so I know which colors are going where and to follow the curved lines. Following the curve helped me achieve the thread direction I was aiming for and gave me the gradient effect similar to my reference image.
In this area I worked with 7 colored blues to achieve the gradient effect I was aiming for, blending all thread colors together with long and short stitches. Ending each stitch row around the middle of the next one.
- Hair Direction
The shine from the thread direction
Embellishments
 |
| Moving onto Embellishments |
 |
| Amazon purchase! |
 |
| Walmart Purchase! |

Back Felt Tips
 |
| For a softer feeling after washing, add a little fabric softener. |
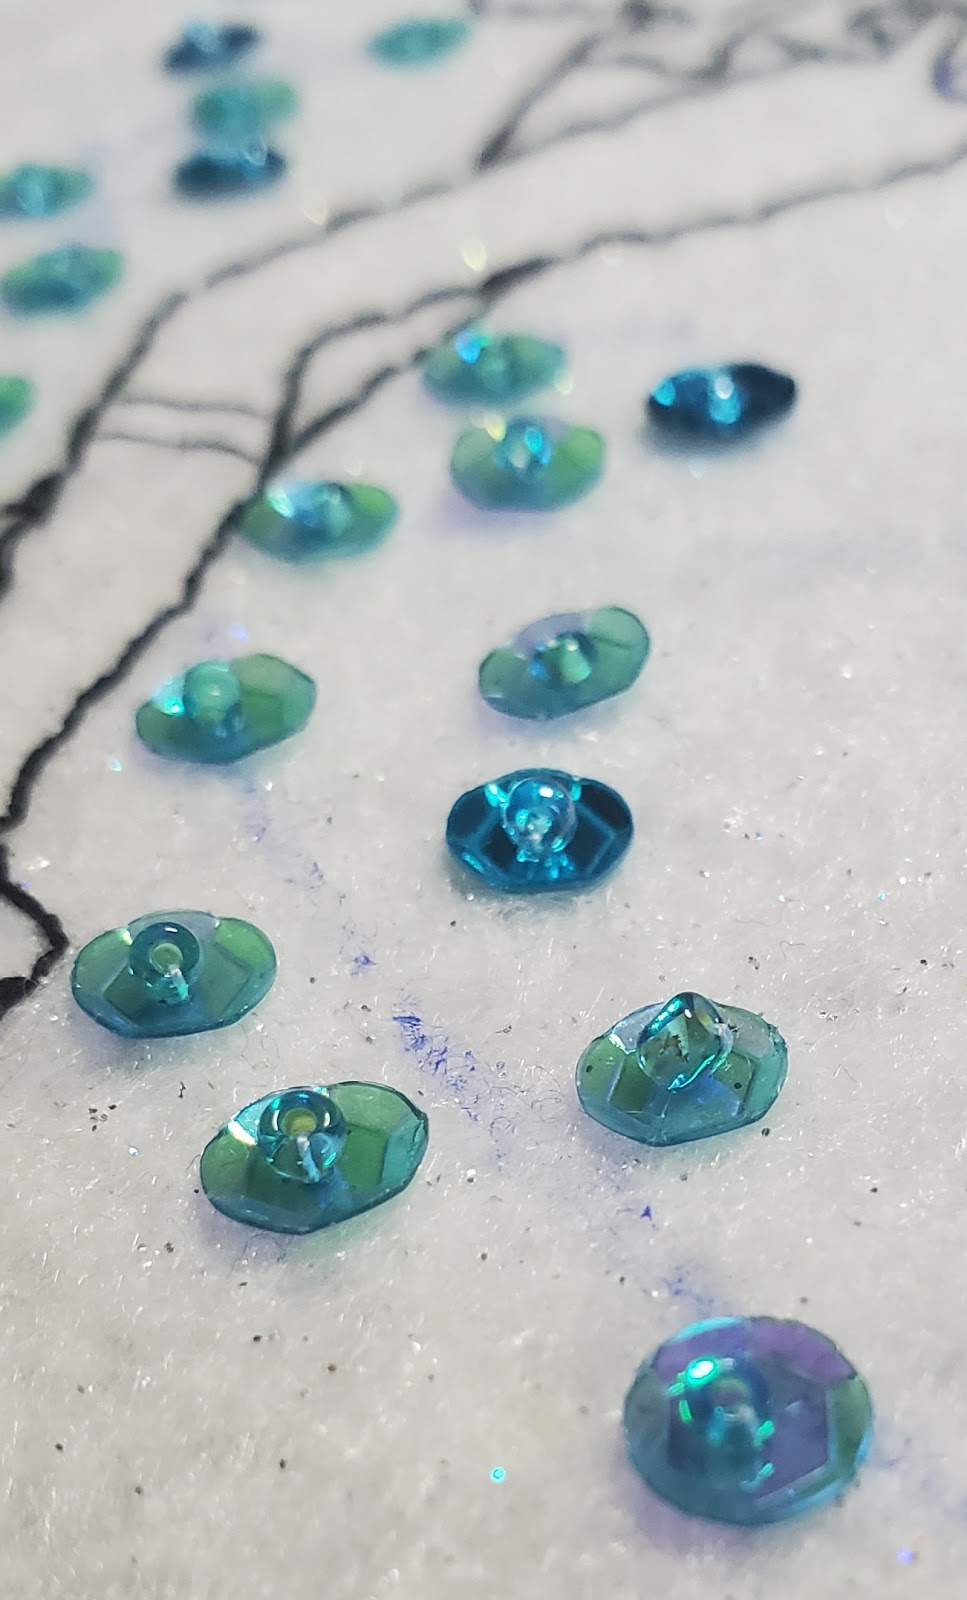 |
| Sequins close up |
Here she is!


Comments
Post a Comment