3 Ways to Transfer Embroidery Patterns onto Fabric | Beginners Guide!

Every stitching artist has a preferred way and method of transferring pattern designs onto the fabric, it's understandable as a beginner this task can be quite challenging for some. Do not fear! Let's find out which option is best for you together!
Here listing down just three of my top methods of transferring:
Carbon Paper
I know this paper falls under many names but wax-free carbon paper or simple graphite paper, is by far my most favorite way of transferring a reference image onto fabric. I will guide you on what to do and what not to do, when it comes to carbon paper it's fairly simple to work with and so little tools are required. Carbon paper also comes in blue and whites, meaning you can also use this method to trace onto darker colored fabrics.
First, make sure your fabric is nicely ironed the flatter and wrinkle free your fabric is the easier it will be to trace onto. I mean, you wouldn't sketch onto crinkled paper so let's not trace onto wrinkled fabric. Before getting ready to transfer, make sure you're working on a clean and flat surface for smooth tracing. I also recommend taping down your fabric onto your surface to prevent your fabric from moving too much.
After, you figure out where you're going to place your design make sure to have your image tapped onto the carbon paper, it's better to do this instead of having loose layers on top of one another. I use paper weights to keep my image in place, it's best to keep your weights on an area that will be colored since this method causes smudges in clean areas.
Water Soluble Stabilizer or Fabric Solvy
This method is another great way of directly transferring the entire image onto your fabric, since you can print directly onto the solvy it makes embroidering easy. I usually buy my fabric solvy in sheets on Amazon, this makes it perfect for me to just place a sheet into my printer and have the image directly printed onto the fabric with ease.
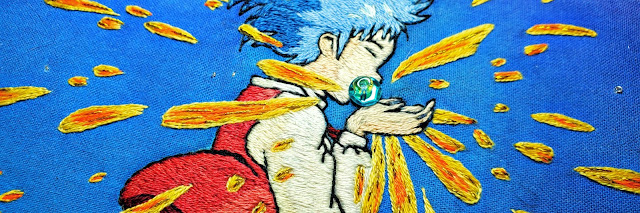
When making detailed pieces or a basic Manga panel, this method comes in handy when it comes to having every detail.
When putting your fabric solvy into the printer make sure you have no bent edges, this can cause a printer jam since the solvy is somewhat like a sticker paper. Make sure your fabric solvy is facing the wrong way when putting it in to print, just remember, soft side down, shiny side, up!
Once I finish my outline and small detailed lines or areas, I rinse off my solvy before thread color filling my reference image. Also, solvy makes the thread feel stiff when dried, I suggest using a dime size amount of fabric softener or dish soap to keep your floss thread soft, gently work the soap into the stitches using lukewarm water. Do not scrub the soap into the fabric, you may run the risk of loosening your stitches.
Note: I know many who directly fill the entire image with embroidery floss before actually rinsing off the solvy from the fabric, to be honest, I've done this twice. Unfortunately, when I rinsed off the solvy and left my hoop to dry, I kept noticing a yellowish stain on my white fabric, the second time I noticed this happened I finally figured out that the thread was the last to dry since it's bulky and left the stain around the embroidered area.
Tracing
I hope these tips and tricks helped!
Don't be shy to ask questions, it's the only way to continue progressing during your embroidery journey!

Comments
Post a Comment